

As we wrapped up the first year of homeschooling, I found myself increasingly concerned about the possibility of summer learning ... read more
November 13, 2025


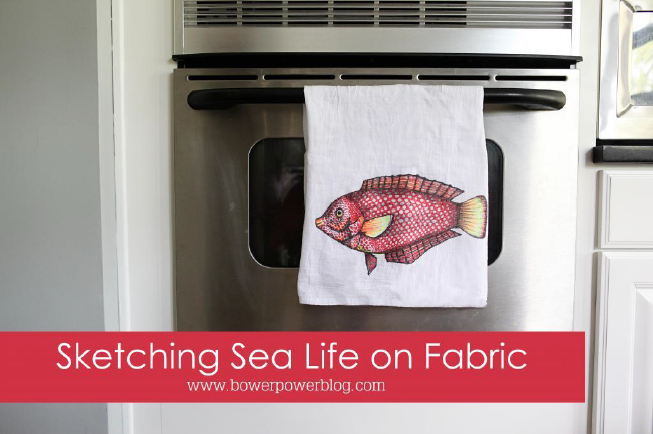
I’m always looking for fun DIY projects to help me remember special vacations. I love being reminded of the sand between my toes and the sea salty wind in my hair. So I hunt for ideas like a savage. Here’s my latest project, just one of many ways to celebrate and commemorate your ocean adventures.
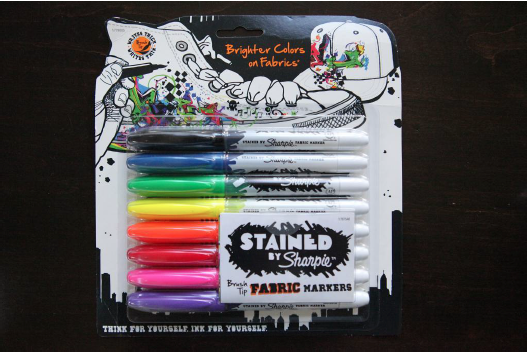
First – a little back story….right before I had LJ, my mom asked me if there was anything special I wanted for the boys….she knows I have an overabundant fondness for matching kids clothing. So I told her that I would love to have matching t-shirts for all three boys that said “little brother,” “big brother” and “biggest brother.” She couldn’t find any that were my style…so she decided to make them. She took a regular sharpie and made some cute tees for the boys. And then I washed them….and they bled everywhere. It was a sad, sad day.
When she found out about the leaky-tees, we were both a little bit stunned that permanent markers like Sharpies didn’t stay on the t-shirts because OBVIOUSLY they stain other fabrics and never come out (coughrockingchaircough). So I set out to find another way to mark on fabric.
Now, granted, you can make big brother t-shirts to your heart’s delight but for me, I thought this would be a fun way to memorialize some of the fantastic sea life that Jeremy and I have experienced on our past vacations. Not to mention the fact that it’s making me even more excited about our upcoming cruise with Carnival Cruise Lines. Oh I didn’t mention the fact that we are gonna be CRUISING in November?! Yeah. You can hashtag me screaming right now with pure delight and excitement.
Now back to this fabulous project at hand…
First thing you need are these Sharpie markers. I know. They are Sharpies. But they aren’t just any Sharpies – they are specifically formulated for fabrics. I ordered them on Amazon and they are VERY bright colors – think florescent on steroids.
You will also need your materials for marking up…i.e. t-shirts, dishtowels, napkins, pillow cases, sheets, curtains, lampshades, etc. Make sure you wash them first. Not the lampshades…that would be awkward.
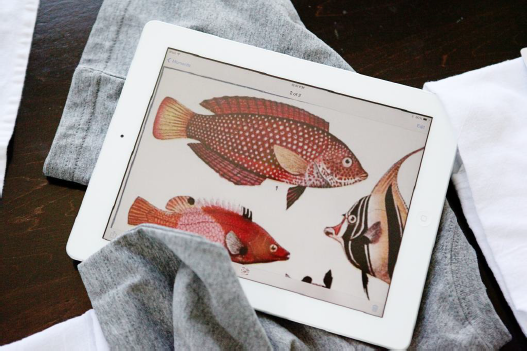
Next you will need inspiration. In this case, I was going for sea life. Hence the Pinterest-ready labeled photo previously shown above 🙂 If you have photos from snorkeling on your latest cruise, a postcard from your favorite beach vacation, even just Googling or Pinteresting photos that remind you of a ocean hot spot will bring up TONS of options.
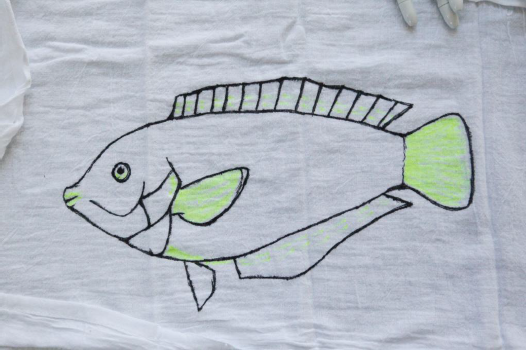
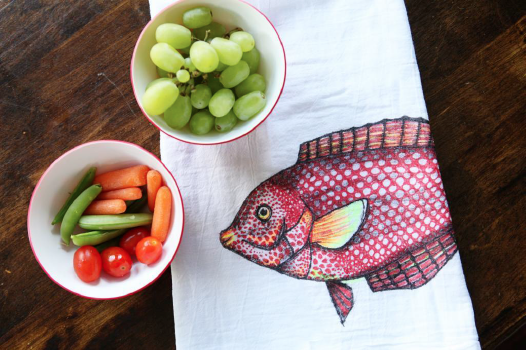
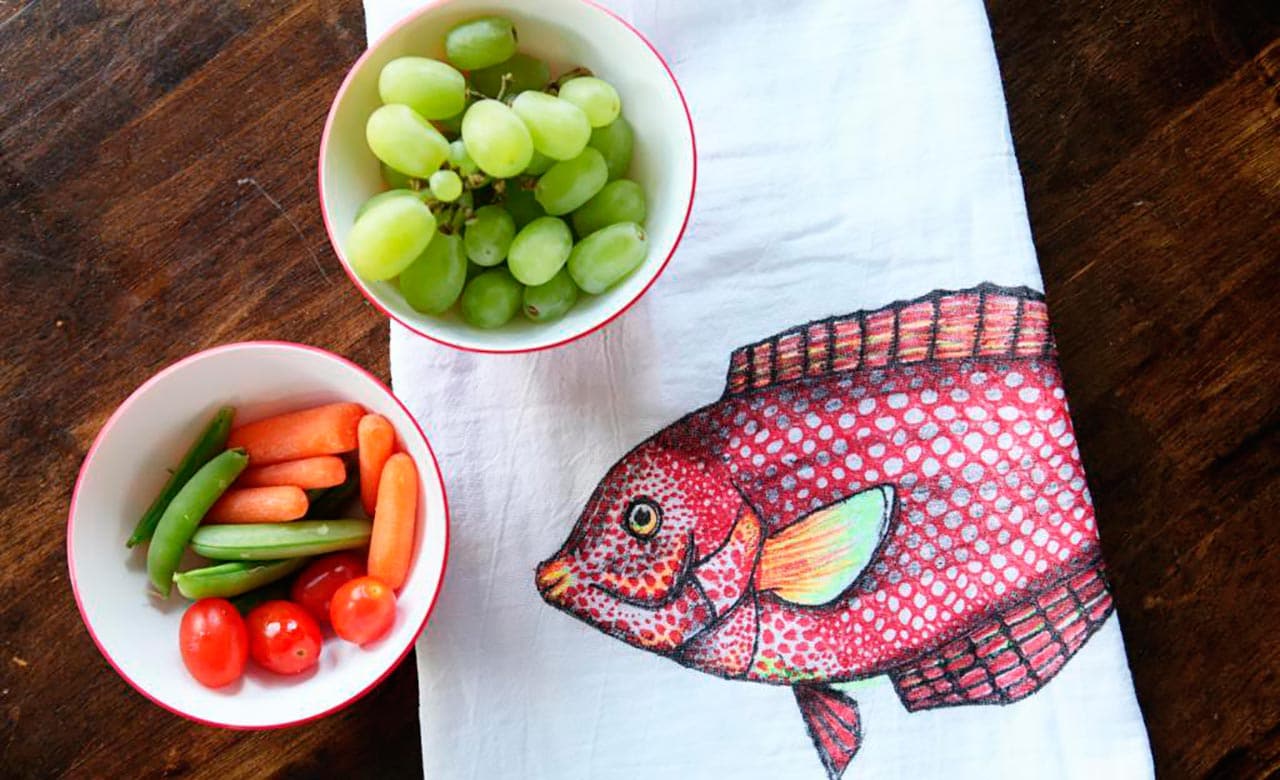
I used the fish picture above as my inspiration. I remember seeing some crazy polka dotted fish from our trip to Eleuthera and these matched up with my brilliant colors (the actual fish listed above is from Hawaii, so maybe I am dreaming that one day I’ll go there!).
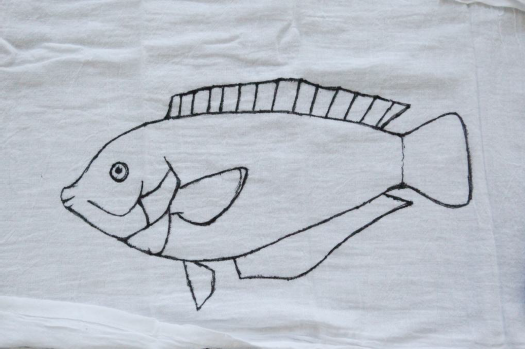
Okay, so first you outline your sea life. If you feel more comfortable tracing – print out the picture on paper and put it under your dishtowel. Sea life is full of crazy edges so it doesn’t matter if it’s exactly perfect (evidence above!). Then you want to fill in any highlighted areas. If it is supposed to stay white in certain areas – just try to make a mental note of that.
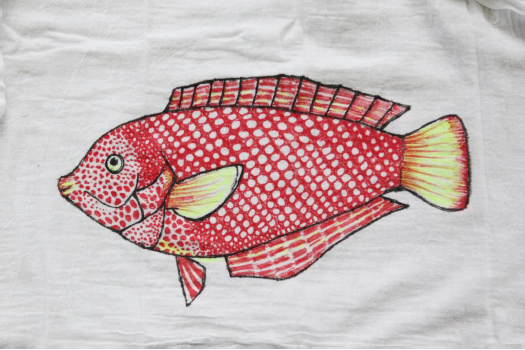
Then comes the main event color…in this case, red. Still looking like an elementary schooler drew it…
I found that it helps to add one more mid-tone color…in this case, orange. And when I say mid-tone, I mean burn-a-hole-in-the-sun-neon-orange.
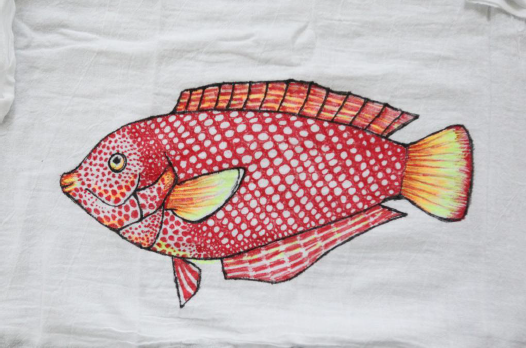
Then comes the important part – the shading. I went through and redefined any lines (around the eyes, the fins, etc.) with the tip of the marker…making it more bold. Then I turned my marker sideways (like you would hold a crayon if you did a rubbing) and started with the shading.
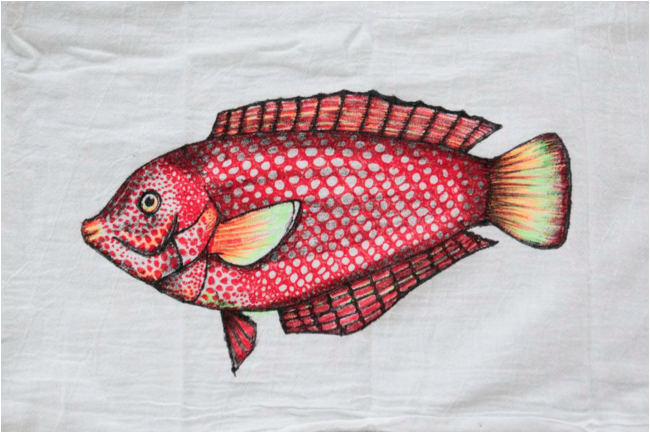
After you are done, it should look like a graphic towel that you would buy at a trendy little shop that would cost you all the money you enveloped for food that month. And now for the high-speed gif…
Your final step is to wash the fabric in cold water. I ironed mine first. I know the instructions said to just wash – but I didn’t want this to bleed so I ironed it on a med-high setting with no steam. Washing in cold after should set it in extra well.
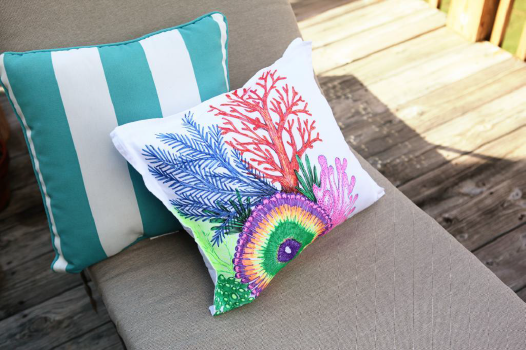
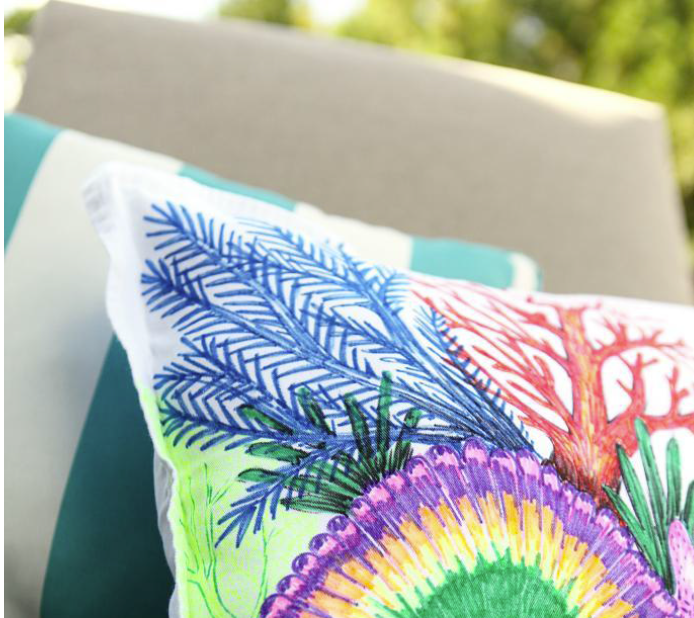
I also created an easier version if you feel like shading might be too hard. It’s a coral reef, and I tried to make it as simple as possible. This would be a great activity for kids too because they can draw their own creations!
Obviously I embraced the big bold colors that were available in the pack but if I were to do it all over again, I think I would try my hand at simpler things – like a t-shirt for Weston that says MUNCH in bold (his nickname) or an outline of a monster truck for Will that he could color in all by himself. The possibilities are endless!
This post was created as part of my collaboration with Carnival. As always, all of the opinions, thoughts, and ideas in this post are my own.
![]()
By Bower Power
After Katie and Jeremy Bower got married, they bought a house and started renovating. They also founded a blog to keep their family updated and it soon found a wider audience. Katie has a love for home decor, entertaining, jokes and photography. But her first passion is raising her three young boys with her husband Jeremy. Follow along as she catalogues their journey at BowerPowerBlog.com .
As we wrapped up the first year of homeschooling, I found myself increasingly concerned about the possibility of summer learning ... read more
If there’s one thing we love doing here at Carnival Cruise Line, it’s dreaming up new ways for the world’s ... read more
Best Places to Visit in Alaska While Cruising Juneau Ketchikan Skagway Sitka Icy Strait Point Victoria Although the snowy peaks ... read more
Whether you’re looking for a chill family getaway or a relaxing couples vacation, we’ve got the spots to kick back! ... read more
Ready for an adventure that will literally light up your life? The Northern Lights are a cosmically show-stopping natural wonder ... read more
These natural preserves are a must-see! There is plenty to see when you travel to the Caribbean. Although beaches may ... read more
Canopy Adventure & Wildlife Expedition Bering Sea Crab Fisherman’s Tour Adventure Kart Expedition Tracy Arm Fjord & Glacier Explorer Exclusive ... read more
Top 8 Things to Do in Sitka Jet-Cat Wildlife Quest & Beach Exploration Sea Otter & Wildlife Quest Wilderness Sea ... read more
The 49th State is a wild, untamed natural wonderland just waiting to blow your mind. We’re talkin’ breathtaking ancient glaciers. ... read more
Want to set off on an extended trip you’ll never forget? Head out on a Carnival Journeys getaway! This longer, ... read more
Finding the person you want to spend the rest of your life with is truly one of the most beautiful ... read more