As we wrapped up the first year of homeschooling, I found myself increasingly concerned about the possibility of summer learning ... read more
November 13, 2025


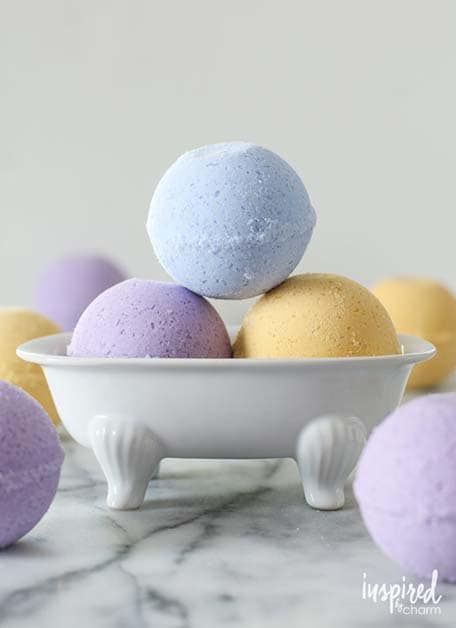
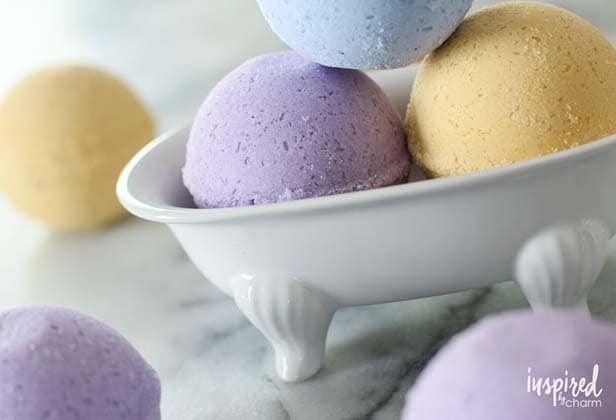
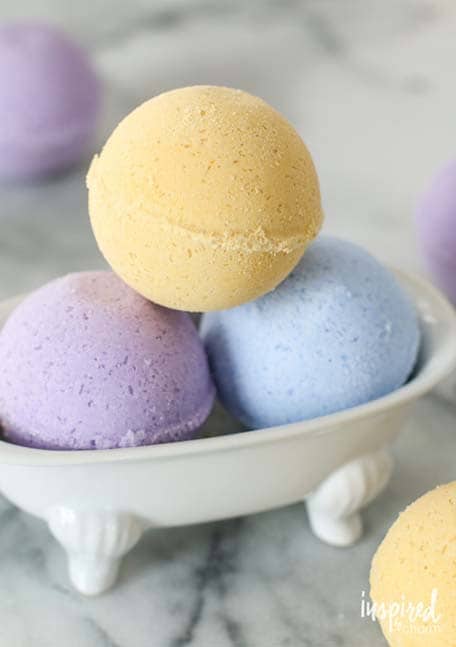
Though I don’t do it nearly often enough, one of my favorite ways to decompress after a long week (or sometimes a long day) is to pour a glass of wine, light some candles, and hop into the tub. To make the experience even more special, I toss a bath bomb into the water. The fizzy bubbles, essentials oils, and beneficial minerals are a treat for the senses.
Today, I’m going to show you how you can create your own custom DIY Bath Bombs at home. If you’re anything like me, maybe having these on hand will encourage you to decompress a bit more frequently.
This year I’ve teamed up with Carnival Cruise Line to share a variety of tips and ideas inspired by my time on their ships. We’ve covered cocktails, DIY travel accessories, a handmade serving tray, and so much more. Now, inspired by their Cloud 9 Spa, we’re going to tap into the relaxing side of things.
As much as I love an adventurous vacation full of activity and sightseeing, I equally enjoy a day of pampering. Whether it’s a massage, facial, or just hanging out in a thermal suite in the Cloud 9 Spa, I’m a firm believer in the benefits of relaxation.
In an effort to bring some of that relaxation home with me and create a spa-like experience whenever I needed it, I decided to make my own DIY Bath Bombs.
Now, if you’re feeling intimidated by this process, don’t be. These bath bombs are so simple to make and really easy to customize. Let me show you.
First, gather all of your ingredients. I found everything online and linked things up below to make it easy for you.
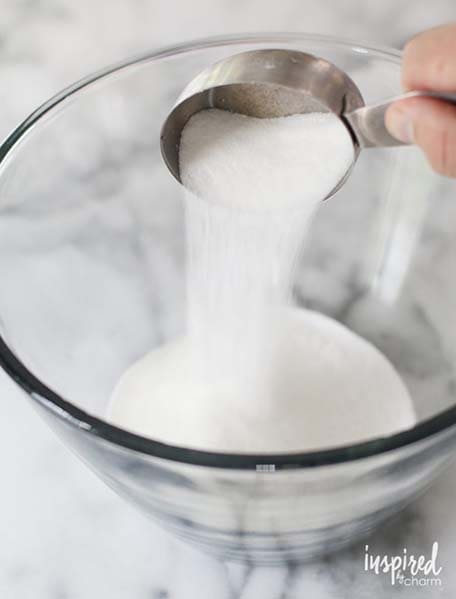
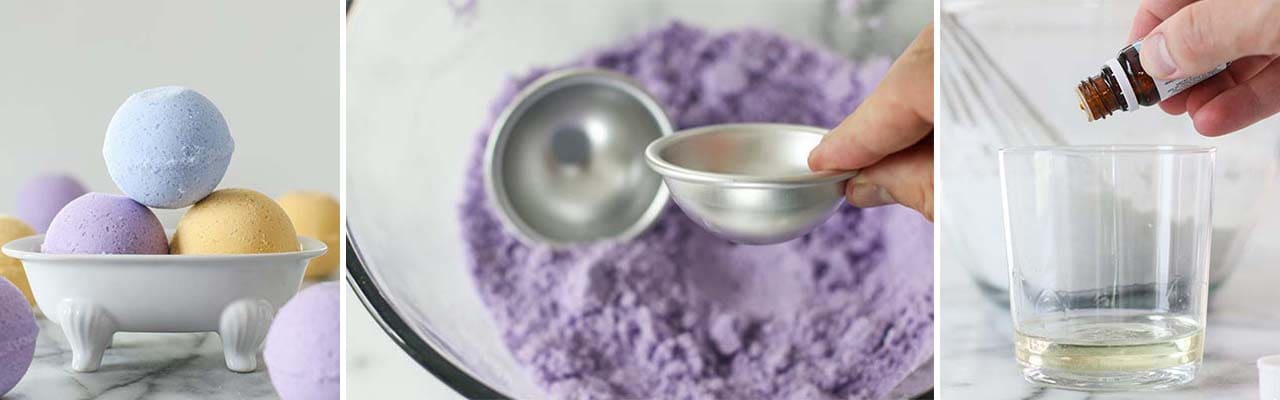
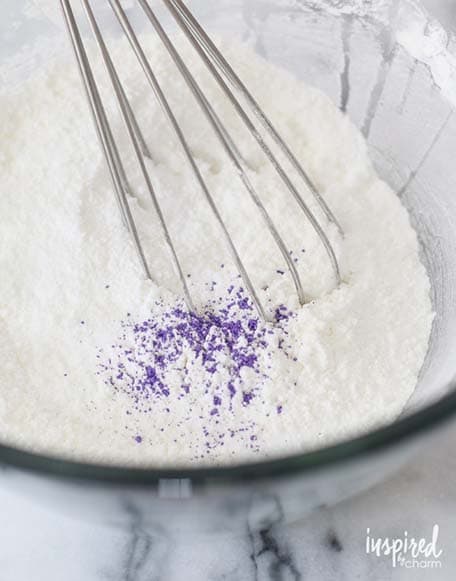
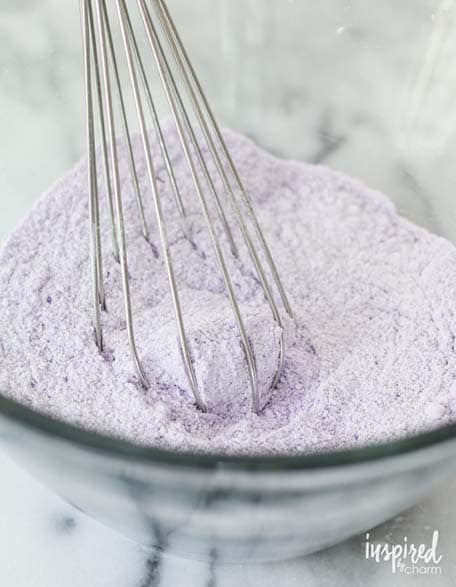
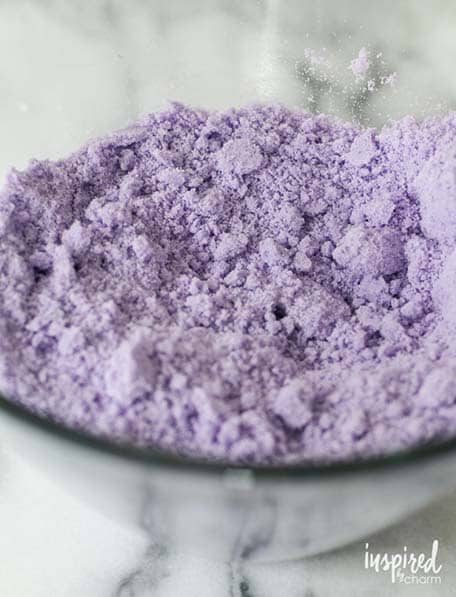
Begin by measuring out and whisking together your dry ingredients in a large bowl. I used a coloring pigment for my bath bombs. Since it’s a dry pigment, you’ll want to include that in this step. Add as little or as much as you’d like to achieve the color you prefer.
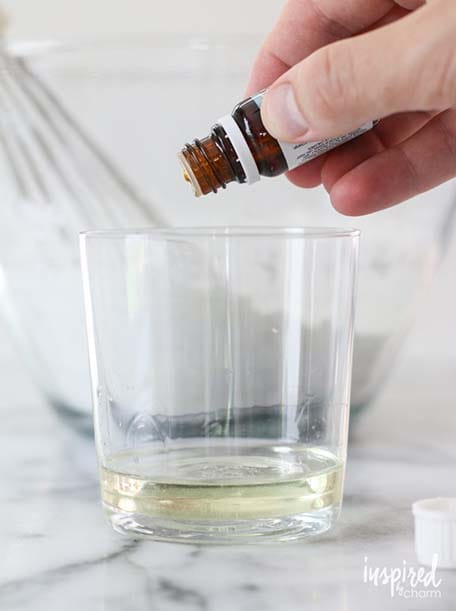
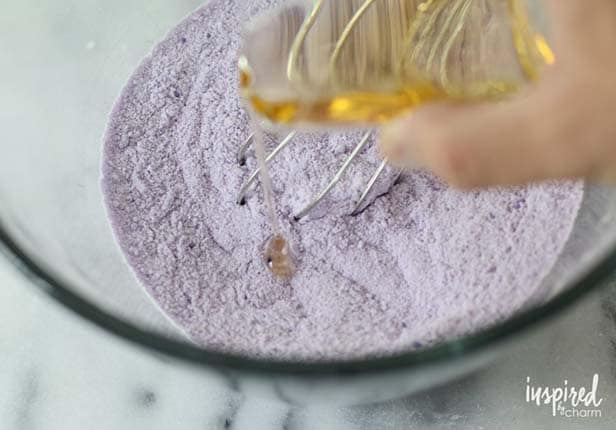
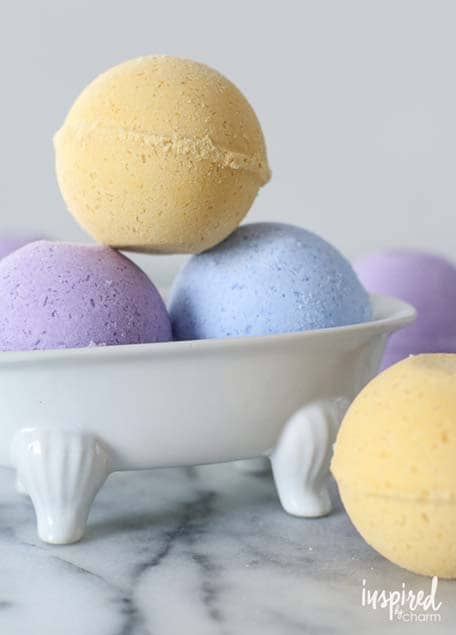
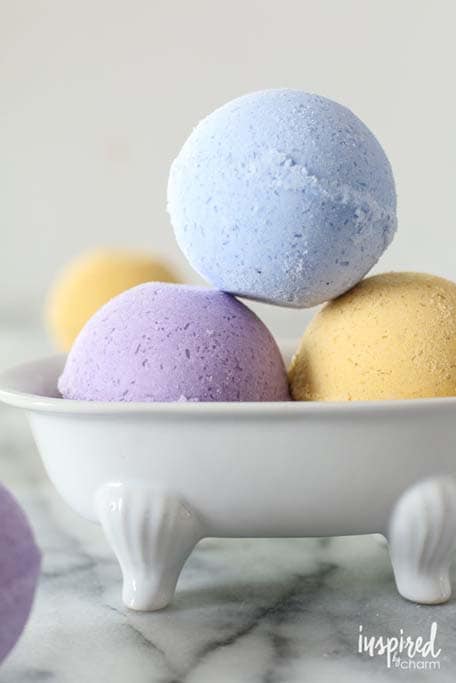
Next, in a small cup, mix together the wet ingredients. This is also where you’ll add the essential oils. You can get essential oils almost anywhere these days. I recommend shopping for these in person so you can find a scent you like. Also, pay attention to the benefit each oil offers. I made three different varieties. The purple bath bomb has an oil for stress relief, the blue prompts sleep, and the yellow promotes joy.
The next step is very important. You need to add the wet ingredients to the dry ingredients. You’ll want to do this very slowly, adding little drops at a time while mixing. The citric acid is what causes the bath bombs to fizz when it comes into contact with water. Adding the wet ingredients slowly minimizes this affect, allowing you to create the ball.
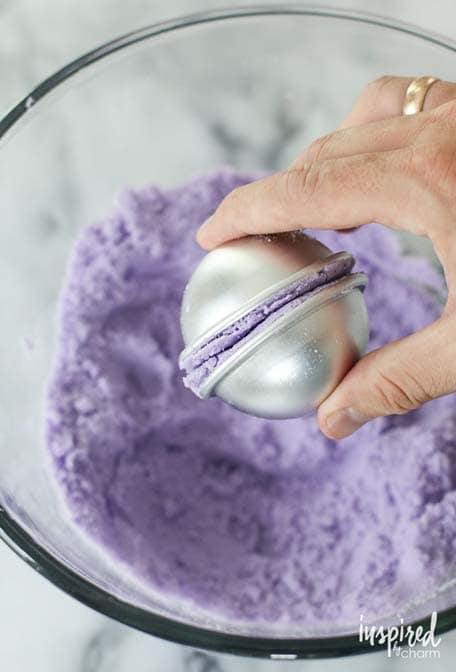
Once mixed, you’re ready to mold. I picked up these bath bomb molds to create a ball shape. However, you can use things like a cupcake pan or silicon mold to achieve different shapes and sizes.
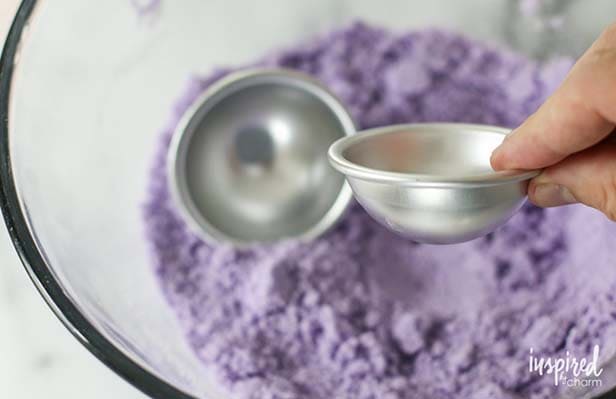
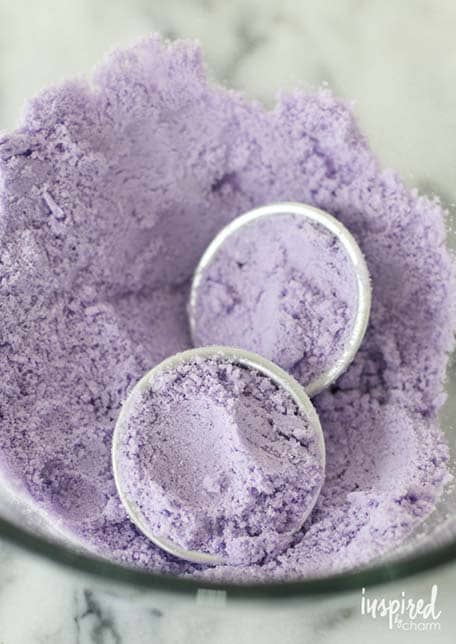
For this round mold, fill each half, packing it in slightly until it’s overflowing. Then, firmly press the halves together. Let the mold sit for one minute. Once set, tap the mold and pull it apart.
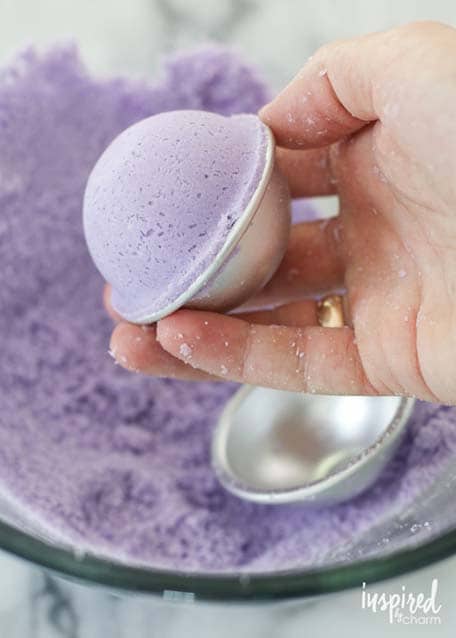
You’ll want to let the bath bombs dry for at least 24 hours before you create your own mini spa in your tub.
It’s that easy!
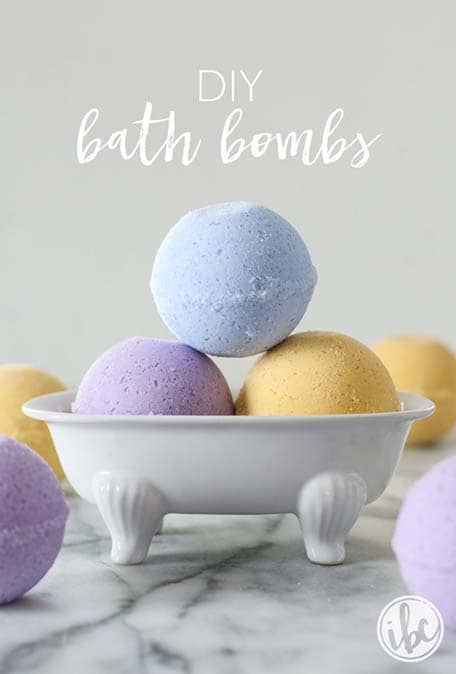
DIY Bath Bombs
Makes 4
Here’s what you will need:
In a medium bowl, mix together all of the dry ingredients. Add as much or as little color pigment to achieve desired look. Whisk to combine.
In a separate small bowl, mix together the wet ingredients.
Add the wet ingredients to the dry ones very slowly. (This is very important; otherwise you will activate the citric acid which is used to create the fizzing affect.) Mix until combined, and the ingredients look like wet sand.
Fill each half of the mold, packing the mixture in slightly until it’s overflowing. Press the halves together firmly. Let the filled mold sit for one minute. Lightly tap the mold and gently pull it apart to remove the bath bomb. Let the bath bombs dry for 24 hours before enjoying in the tub.
If you have yet to make or even experience a bath bomb, I definitely recommend giving it a try.
What I really love about making these at home is that you can customize the oils and colors to create the best experience for you. Whether you want to relax, sleep more easily, or feel inspired, just changing a few things will help you achieve the mood you’re after.
These bath bombs also make a great gift. Wrap up a few with a bottle of wine and a couple candles for the ultimate treat.
And as always, for more information on Carnival or details about their Cloud 9 Spa, head on over to their website.
This post was created for Away We Go with Carnival, the destination for getting in the getaway state of mind.
![]()
By Inspired by Charm
Michael Wurm, Jr. is the interior designer, cook and crafter behind the popular lifestyle blog Inspired by Charm, where you will find imaginative recipes, DIY projects, home décor inspiration and hosting tips and more.
As we wrapped up the first year of homeschooling, I found myself increasingly concerned about the possibility of summer learning ... read more
If there’s one thing we love doing here at Carnival Cruise Line, it’s dreaming up new ways for the world’s ... read more
Best Places to Visit in Alaska While Cruising Juneau Ketchikan Skagway Sitka Icy Strait Point Victoria Although the snowy peaks ... read more
Whether you’re looking for a chill family getaway or a relaxing couples vacation, we’ve got the spots to kick back! ... read more
Ready for an adventure that will literally light up your life? The Northern Lights are a cosmically show-stopping natural wonder ... read more
These natural preserves are a must-see! There is plenty to see when you travel to the Caribbean. Although beaches may ... read more
Canopy Adventure & Wildlife Expedition Bering Sea Crab Fisherman’s Tour Adventure Kart Expedition Tracy Arm Fjord & Glacier Explorer Exclusive ... read more
Top 8 Things to Do in Sitka Jet-Cat Wildlife Quest & Beach Exploration Sea Otter & Wildlife Quest Wilderness Sea ... read more
The 49th State is a wild, untamed natural wonderland just waiting to blow your mind. We’re talkin’ breathtaking ancient glaciers. ... read more
Want to set off on an extended trip you’ll never forget? Head out on a Carnival Journeys getaway! This longer, ... read more
Finding the person you want to spend the rest of your life with is truly one of the most beautiful ... read more